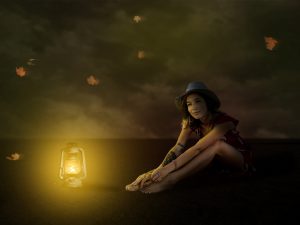
Atmosphere – Lantern
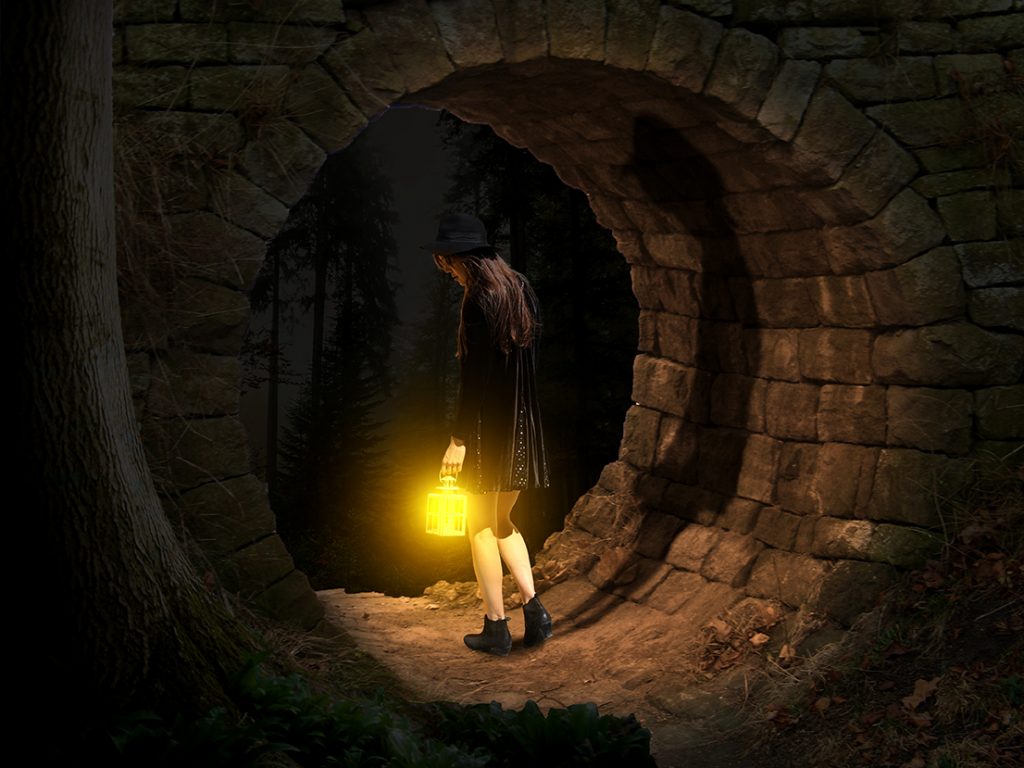
Photoshop Tutorial – ‘Atmosphere – Lantern’
We start with 5 photo (see ZIP file): tree.jpg, tunnel.jpg, forest.jpg, model.png and lantern.jpg
Start
Open a new document.
Open the photo ‘tree.jpg’.
Select the ‘quick selection tool’ from the left side toolbar and make a selection of the tree on the left.
Select>Modify>Feather by 1 pixel.
Place the selection on its own layer by pressing ‘Ctrl+j’.
Import this layer into the main document.
Re-size and position to suit’
Tunnel and Forest
Open the photo ‘tunnel.jpg’.
Select the ‘quick selection tool’ from the left side toolbar and make a selection of the centre of the tunnel.
Select>Modify>Expand by 2 pixels.
Select>Modify>Feather by 1 pixel.
Press ‘Del’ to remove the selection.
Import this layer into the main document.
Move this layer to be below the ‘tree’ layer.
Re-size and position to suit’
Open the photo ‘forest.jpg’.
Import this layer into the main document.
Move this layer to be below the ‘tunnel’ layer.
Position to suit.
Click the ‘Create new fill or adjustment layer’ icon at the bottom of the Layers Window and select ‘Hue/Saturation’.
Attach these layers by ‘Alt+clicking’ between them.
Adjust ‘lightness’ to about -80.
Do the same to the other 2 layers (tree and tunnel).
Model and Lantern
Open the photo ‘model.png’ and import into the main document.
Re-size and position in the tunnel.
Open the photo ‘lantern’ and import into the main document.
Re-size and position in the model’s hand.
Click the ‘Create new layer’ icon at the bottom of the Layers Window and move to the top of the ‘layers stack’.
Select the ‘foreground colour’ icon from the left side toolbar and select a yellow colour.
Select the ‘brush tool’ from the left side tool bar and ‘click’ to paint the yellow over the lantern.
Change ‘blending mode’ to ‘Hard Light’.
Click the ‘Create new layer’ icon at the bottom of the Layers Window and move to the top of the ‘layers stack’.
Select the ‘foreground colour’ icon from the left side toolbar and select a orange colour.
Select the ‘brush tool’ from the left side tool bar, adjust the size to be twice the size and ‘click’ to paint the orange over the lantern.
Change ‘blending mode’ to ‘Hard Light’.
Light and Shadow
Select the ‘tunnel’ layer.
Click the ‘Create new fill or adjustment layer’ icon at the bottom of the Layers Window and select ‘Hue/Saturation’.
Attach these layers by ‘Alt+clicking’ between them.
Click ‘colorize’ and adjust ‘Hue’ to 25 and ‘Saturation’ to 50.
Select the ‘layer mask’ and press ‘Ctrl+i’ to invert the mask.
With a soft white brush at 100% paint back the warm glow on the tunnel wall.
Select the ‘model’ layer and make a copy by pressing ‘Ctrl+j’.
Select the bottom ‘model’ layer.
Image>Adjustments>Hue and Saturation – move ‘lightness’ all the way over to the left (-100).
Edit>Transform>Distort.
Drag the top middle handle over to the right so the shadow is lying on the tunnel wall.
Edit>Transform>Warp.
If you wish to have a ‘grid’ on the shadow go to ‘grid:’ (on the second top menu bar and choose the size of the grid), Otherwise just click and drag various parts of the shadow to form an arch on the wall of the tunnel.
Select the top ‘model’ layer.
Click the ‘Create new fill or adjustment layer’ icon at the bottom of the Layers Window and select ‘Hue/Saturation’.
Attach these layers by ‘Alt+clicking’ between them.
Click ‘colorize’ and adjust ‘Hue’ to 25 and ‘Saturation’ to 50.
Select the ‘layer mask’ and press ‘Ctrl+i’ to invert the mask.
With a soft white brush at 100% paint highlights down the left side and face of the model.
Finishing
Select the top layer in the ‘layers stack’.
Click the ‘Create new fill or adjustment layer’ icon at the bottom of the Layers Window and select ‘levels’ adjust as necessary.