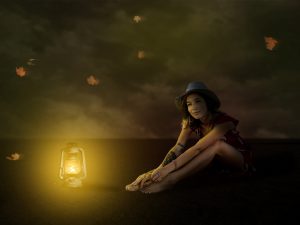
Another World
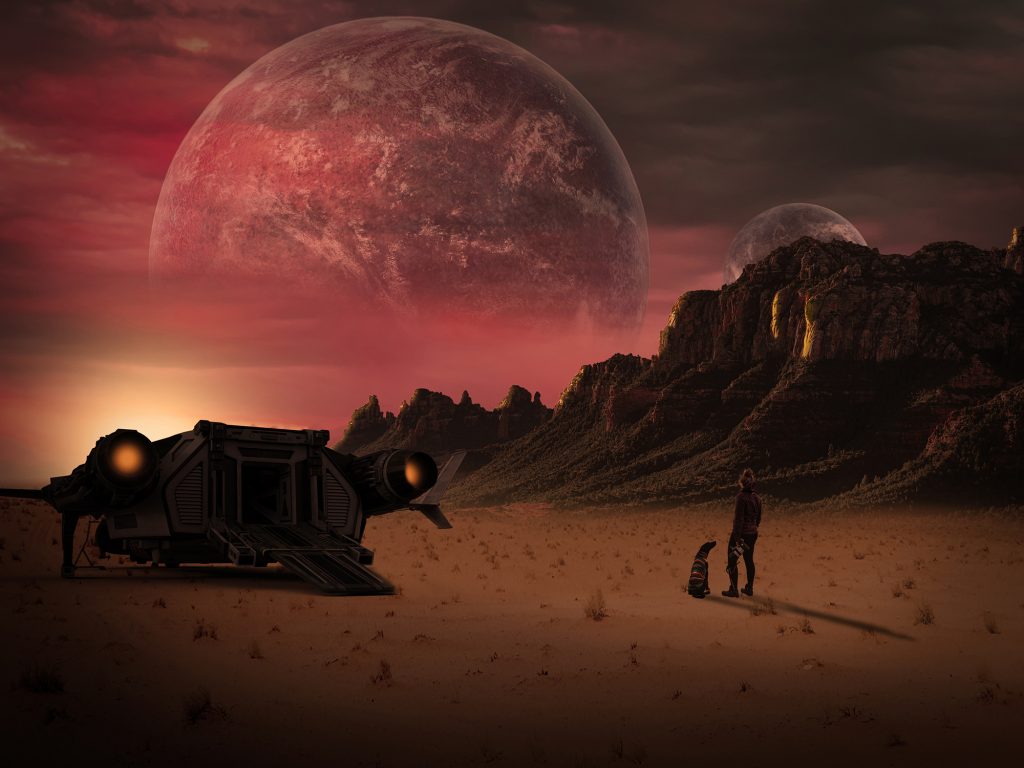
Photoshop Tutorial – ‘Atmosphere – Another World’
We start with 6 photo all contained in this zip file
Open a new document.
Open the photo ‘ground.jpg’, use the ‘rectangular marquee tool’ from the left side toolbar to select the ground.
Place selection on it’s own layer by pressing ‘Ctrl+j’ then import it into the main document.
Re-size and position at the bottom, Elongate the selection by holding down ‘shift’ while dragging up the top middle handle until it is just above the bottom third.
Click the ‘Add layer mask’ icon at the bottom of the ‘Layers Window’.
Select the ‘Gradient tool’ from the left side toolbar, make sure it is on ‘black to transparent’ at 100% and ‘click’ just above the ‘bottom third line’ and drag to the ‘bottom third line.
Click the ‘Create new fill or adjustment layer’ icon at the bottom of the ‘Layers Window’ and select ‘Hue/Saturation’, attach this to the layer by ‘Alt’ clicking between the two layers.
Adjust ‘Lightness’ slider to -60.
Mountains and Sky
Open the photo ‘hills.jpg’, use the ‘quick selection tool’ from the left side toolbar to select the mountains.
Select>Modify>Feather – 1 pixel should do it.
Place selection on it’s own layer by pressing ‘Ctrl+j’ then import it into the main document.
Edit>Transform>Flip Horizontal
Re-size and position at the left side.
Click the ‘Add layer mask’ icon at the bottom of the ‘Layers Window’.
Using a soft black brush at 100%, brush away the bottom of the mountains to blend them into the ground.
Click the ‘Create new fill or adjustment layer’ icon at the bottom of the ‘Layers Window’ and select ‘Hue/Saturation’, attach this to the layer by ‘Alt’ clicking between the two layers.
Adjust ‘Lightness’ slider to -60.
Open the photo ‘sky.jpg’, use the ‘rectangular marquee tool’ from the left side toolbar to select the sky.
Place selection on it’s own layer by pressing ‘Ctrl+j’ then import it into the main document.
Re-size and position to fill the sky area.
Move this ‘layer’ to be just below the ‘ground’ layer.
Click the ‘Create new fill or adjustment layer’ icon at the bottom of the ‘Layers Window’ and select ‘Hue/Saturation’, attach this to the layer by ‘Alt’ clicking between the two layers.
Adjust ‘Lightness’ slider to -30 and ‘Saturation slider’ to +50.
Sun and Light
Click the ‘Create new layer’ icon at the bottom of the ‘Layers Window’ and move it to the top of the ‘layer stack’.
Click the ‘forground picker’ on the left side toolbar and select a sun colour.
With a large soft brush at 100%, with the centre of the brush just above the horizon, click to paint in the sun, reduce ‘opacity’ if necessary.
Select the ‘Hue and Saturation’ layer just above the ‘ground’ layer.
Click the ‘Create new layer’ icon at the bottom of the ‘Layers Window’, attach this to the ‘Hue/saturation’ layer by ‘Alt’ clicking between the two layers.
With a soft brush at 10%, paint in the sun highlighted wedge section along the ground, from the sun to the bottom right corner and up to the base of the mountains, repeat if necessary.
Select the ‘Gradient tool’ from the left side toolbar, make sure it is on ‘black to transparent’ at about 30% and ‘click’ off the bottom of the image and drag up about a third of the ground, repeat if necessary, this will darken the foreground to look more realistic.
Use the same technique to darken the bottom left corner.
Select the ‘Hue and Saturation’ layer just above the ‘mountain’ layer.
Click the ‘Create new layer’ icon at the bottom of the ‘Layers Window’, attach this to the ‘Hue/saturation’ layer by ‘Alt’ clicking between the two layers.
With a small soft yellow brush at 100%, paint in the sun highlighting the mountain edges.
Change ‘blending mode’ to ‘soft light’ and adjust ‘opacity’ to suit.
Alien Planet
Open the photo ‘planet.png’ and import it into the main document
Re-size and position in the sky.
Click the ‘Add layer mask’ icon at the bottom of the ‘Layers Window’.
With a large soft black brush, paint away the bottom of the planet.
Reduce ‘opacity’ to about 60%.
Create another smaller planet using the same technique.
Space Craft
Open the photo ‘ship.png’ and import it into the main document
Re-size and position on the left side.
Click the ‘Add layer mask’ icon at the bottom of the ‘Layers Window’.
With a soft black brush, paint away the unwanted shadows.
Click the ‘Create new fill or adjustment layer’ icon at the bottom of the ‘Layers Window’ and select ‘Hue/Saturation’, attach this to the layer by ‘Alt’ clicking between the two layers.
Adjust ‘Lightness’ slider to -30.
Click the ‘Create new layer’ icon at the bottom of the ‘Layers Window’, attach this to the layer by ‘Alt’ clicking between them.
With a small soft yellow/orange brush at 100%, paint in the engine ‘cooling’, erase the overlapping bit on the second engine cowling.
Model
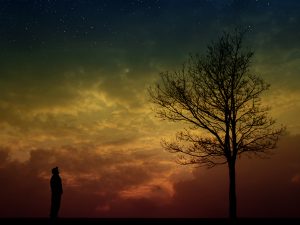
Open the photo ‘model.jpg’.
Select>Subject.
The model and dog should now be selected.
Select>adjust>Feather by 1 pixel
Place the selection on it’s own layer by pressing ‘Ctrl+j’.
Import this layer into the main document.
Re-size and position in the right of the image.
Edit>Transform>Flip Horizontal.
Make a copy of this layer by pressing ‘Ctrl+j’.
Select the bottom of the two layers and :
Image>Adjustment>Hue/Saturation – move the ‘lightness’ all the way over to the left.
Edit>Adjustment>Flip Vertical
Move the shadow into position below the model.
If you hold the ‘Ctrl’ key down it will enter ‘distort mode’ then by dragging the ‘lower centre handle’ to the right you can distort the shadow to get the correct angle to the sun then drag the upper right handles to connect up the ‘feet’ and ‘dog’.
Filter>Blur>Gaussian Blur – round about 8 should do it.
Reduce ‘opacity to 50%
Select the top ‘model’ layer
Click the ‘Create new layer’ icon at the bottom of the ‘Layers Window’, attach this to the layer by ‘Alt’ clicking between them.
With a small soft yellow brush at 100%, paint in the sun highlights on the model and dog.
Change ‘blending mode’ to ‘soft light’ and reduce ‘opacity’ to suit.
Finishing
Select the top layer in the ‘layers stack’.
Click the ‘Create new fill or adjustment layer’ icon at the bottom of the Layers Window and select ‘Photo Filter’ and increase the slider to 70%.
Click the ‘Create new fill or adjustment layer’ icon at the bottom of the Layers Window and select ‘Gradient Map’ make sure it’s on ‘black to white’ and change the ‘blending mode’ to ‘soft light’, reduce ‘opacity’ to about 30% (this increases the contrast).
Click the ‘Create new fill or adjustment layer’ icon at the bottom of the Layers Window and select ‘Gradient Map’. This time ‘click’ in the ‘gradient bar’ at the top.
If the bar is not black to white, you will need to click the arrow beside ‘Basics’ in the ‘Presets’ box and select black to white.
At the bottom of the ‘gradient bar’ there are two handles, black on the left and white on the right, we now need to create another handle by clicking just under the bar, three quarters along it.
Click in the ‘colour’ box and select a dark red colour (#421313).
Reduce ‘opacity’ to about 30%
Click the ‘create new layer’ icon at the bottom of the ‘layers window’ and move it to the top of the ‘layers stack’.
With a large soft black brush at 20% opacity – paint in a vignette, repeat until you get the desired effect.