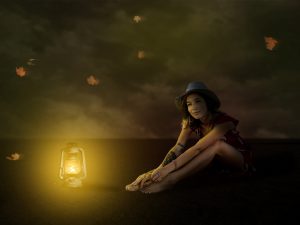
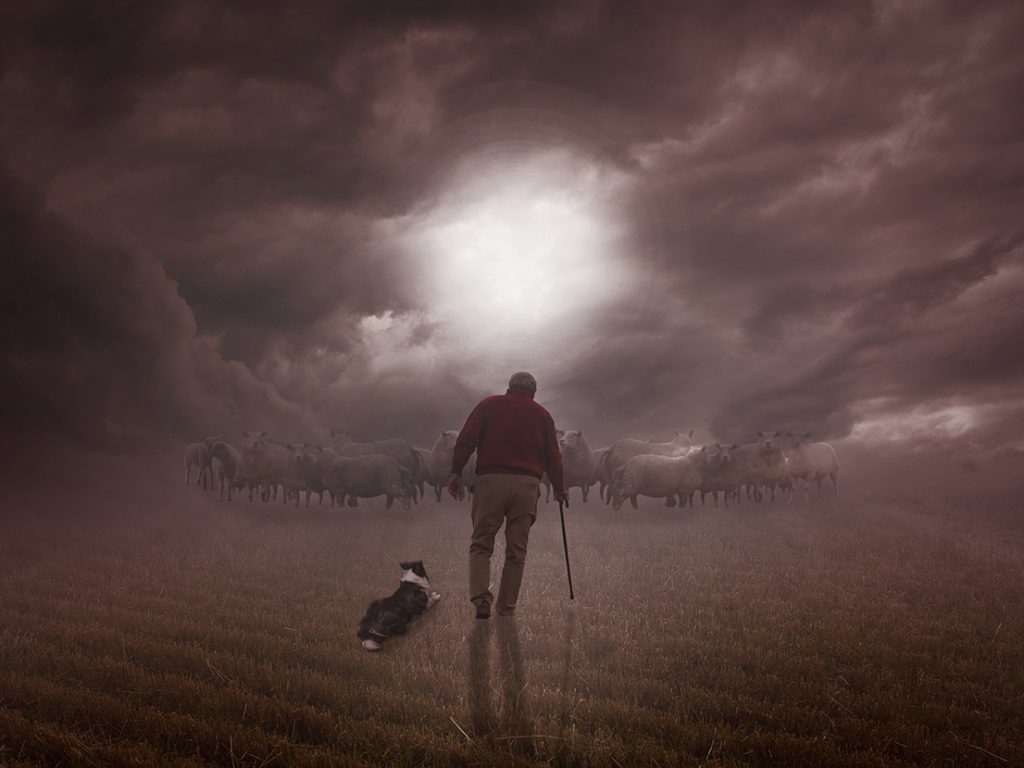
The Shepherd
All 9 starting files are contained in this zip file.
Start
Open a new document.
Edit>Preferences select ‘Guides, Grid & Slices’.
Set the ‘Grid Line’ to 33.3%
Select ‘view’ from the top toolbar, select ‘show’ then select ‘grid’.
Open the photo ‘field.jpg’ and import it into the main document.
Re-size and position so that the bottom of the nearest hay stake is just above the bottom third line.
Click the ‘Create new fill or adjustment layer’ icon at the bottom of the Layers Window and select ‘Curves’ – pull the top right corner down to darken the photo.
Open the photo ‘fog.jpg’ and import it into the main document.
Enlarge this layer until all the background buildings and the bottom line in the grass are off the document.
Click the ‘Add layer mask’ icon at the bottom of the Layers Window.
With a soft black brush blend away the fog in the bottom third.
Open the photo ‘sun.jpg’ and import it into the main document.
Re-size and position so that the sun is in the middle of the ‘top third’ line.
Click the ‘Create new fill or adjustment layer’ icon at the bottom of the Layers Window and select ‘Hue/Saturation’, attach this to the layer by ‘Alt’ clicking between the two layers. Adjust the ‘Saturation’ slider to -100 and ‘Lightness’ slider to +20.
Click the ‘Add layer mask’ icon at the bottom of the Layers Window.
With a soft black brush blend in the fog at the bottom, reduce ‘opacity’ to about 10% and paint away some of the clouds on each side.
Click the ‘Add New Layer’ icon at the bottom of the Layers Window.
With a large soft white brush, click to paint a blotch (half off the document) on the field.
Change ‘blending mode’ to ‘soft light’ and reduce ‘opacity’ to about 80%.
Sheep
Open the photo ‘sheep.jpg’ and import it into the main document.
Re-size and position so they are standing on the bottom third line to the left.
Copy this layer by pressing ‘Ctrl+ Alt’.
Edit>Transform>Flip Horizontal.
Select the ‘move’ tool from the left side toolbar and move the sheep to the right to join up with the other sheep.
Open the photo ‘sheep 2.jpg’ and import it into the main document.
Re-size and position to the left side of the flock.
Click the ‘Create new fill or adjustment layer’ icon at the bottom of the Layers Window and select ‘Curves’, attach this to the layer by ‘Alt’ clicking between the two layers. Pull the top right handle down one section to darken the sheep and blend them into the flock.
Open the photo ‘sheep 3.jpg’ and import it into the main document.
Re-size and position to the right side of the flock.
Click the ‘Create new fill or adjustment layer’ icon at the bottom of the Layers Window and select ‘Curves’, attach this to the layer by ‘Alt’ clicking between the two layers. Pull the top right handle down one and a half sections to darken the sheep and blend it into the flock.
Layer>Merge Down – repeat until all the ‘sheep’ are on one layer. (you will need to ‘merge down’ the two ‘curves’ layers first).
Right click this layer and select ‘blending options’ :
Tick and ‘click’ ‘inner shadow’
Blend Mode = Overlay and white
Opacity = 50%
Set the ‘angle’ to 90% and ‘tick’ use global light
Distance = 10
Choke = 0
Size = 5
Click the ‘Create new fill or adjustment layer’ icon at the bottom of the Layers Window and select ‘Curves’, attach this to the layer by ‘Alt’ clicking between the two layers. Pull the bottom left handle up one and a half sections to lighten the sheep and make them look like are in the fog.
Click the ‘Create new layer’ icon at the bottom of the Layers Window.
With a small black brush set at 10% opacity, paint a shadow under and slightly in front of the sheep.
One Man and his Dog
Open the photo ‘man.jpg’ and import it into the main document.
Re-size and position in the middle of the frame so that his feet are mid way up the ‘bottom third’ and tall enough to cover the sheep.
Make two more copies of this layer by pressing ‘Ctrl+j’ twice.
Select the bottom ‘man’ layer.
Image>Adjustments>Hue and Saturation and drag the ‘Lightness’ slider all the way to the left.
Edit>Transform>Flip Vertical.
Select the ‘move’ tool from the left side toolbar and pull the ‘shadow’ down until the feet match.
Filter>Blur>Gaussian Blur around 10 should do it, then reduce ‘opacity’ to 50%.
Select the middle ‘man layer’.
Click the ‘Create new fill or adjustment layer’ icon at the bottom of the Layers Window and select ‘Curves’, attach this to the layer by ‘Alt’ clicking between the two layers. Pull the bottom left handle up one sections to lighten the man and make him look like he in the fog.
Select the top ‘man’ layer, attach this to the layer below by ‘Alt’ clicking between the two layers.
Edit>Fill 50% grey, then change the ‘blending mode’ to ‘Overlay’.
Select the ‘Burn’ tool from the left side toolbar, set to ‘midtones’ and 10% exposure.
with a small soft black brush, paint over the folds on his cloths to give then more definition.
Do the same with the ‘dodge’ tool to put more light on hid head and shoulders.
Open the photo ‘dog.jpg’ and import it into the main document.
Re-size, position and slightly turn anti-clockwise, to be at the left of the man.
Click the ‘Create new fill or adjustment layer’ icon at the bottom of the Layers Window and select ‘Curves’, attach this to the layer by ‘Alt’ clicking between the two layers. Pull the bottom left handle up half a sections to lighten the dog and make him look like he in the fog.
Click the ‘Create new layer’ icon at the bottom of the Layers Window.
With a small black brush set at 10% opacity, paint a shadow under and slightly in front of the dog.
More Fog
Open the photo ‘more fog.jpg’ and import it into the main document.
Re-size and position to cover the whole document (line up the light parts of the sky’s).
Click the ‘Add layer mask’ icon at the bottom of the Layers Window.
With a large soft black brush blend away the fog in the bottom third.
Reduce brush opacity to 10% and paint away the fog over the man and anywhere else it seems to be to thick.
Finishing
Select the top layer in the ‘layers stack’.
Click the ‘Create new fill or adjustment layer’ icon at the bottom of the Layers Window and select ‘Gradient Map’ make sure it’s on ‘black to white’ and change the ‘blending mode’ to ‘soft light’, reduce ‘opacity’ to about 30%.
Click the ‘Create new fill or adjustment layer’ icon at the bottom of the Layers Window and select ‘Gradient Map’. This time ‘click’ in the ‘gradient bar’ at the top.
If the bar is not black to white, you will need to click the arrow beside ‘Basics’ in the ‘Presets’ box and select black to white.
At the bottom of the ‘gradient bar’ there are two handles, black on the left and white on the right, we now need to create another handle by clicking just under the bar, three quarters along it.
Click in the ‘colour’ box and select a dark red colour (#421313).
Reduce ‘opacity’ to about 50%
Click the ‘create new layer’ icon at the bottom of the ‘layers window’ and move it to the top of the ‘layers stack’.
With a big soft red (#5b1313) brush set at 20% opacity – paint in a vignette, repeat until you get the desired effect.
Click the ‘create new layer’ icon at the bottom of the ‘layers window’ and move it to the top of the ‘layers stack’.
With a large soft black brush at 20% opacity – paint in a vignette, repeat until you get the desired effect.