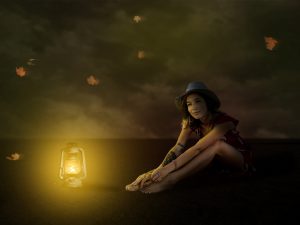
Tranquillity
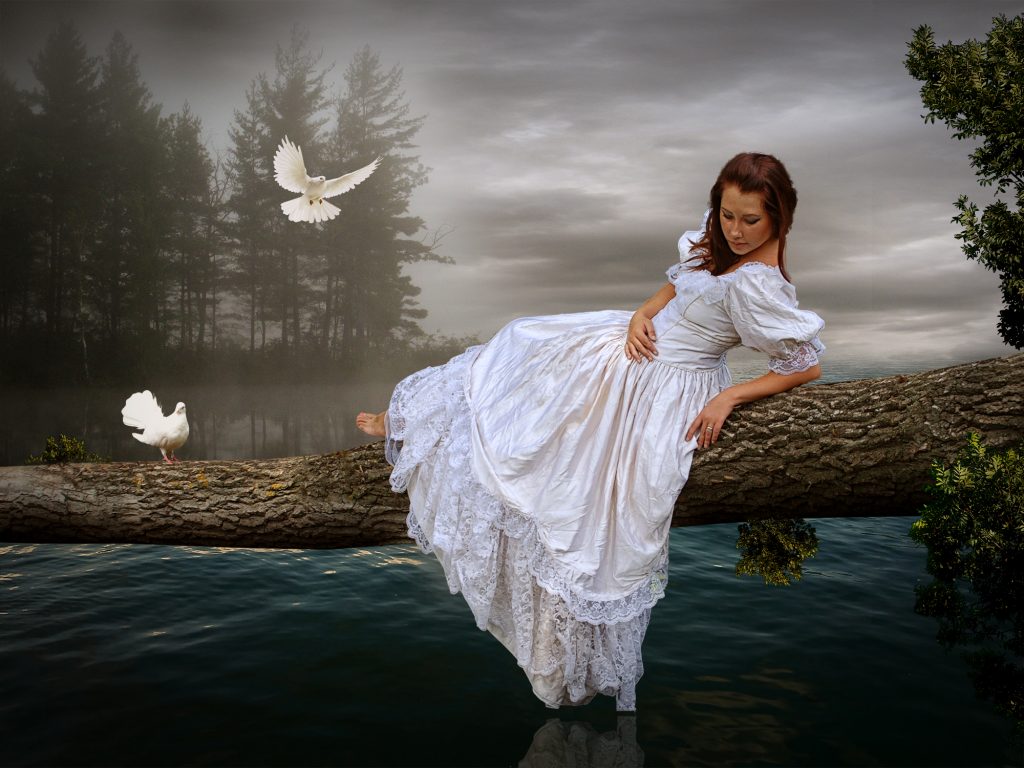
Photoshop Tutorial – ‘Tranquillity’
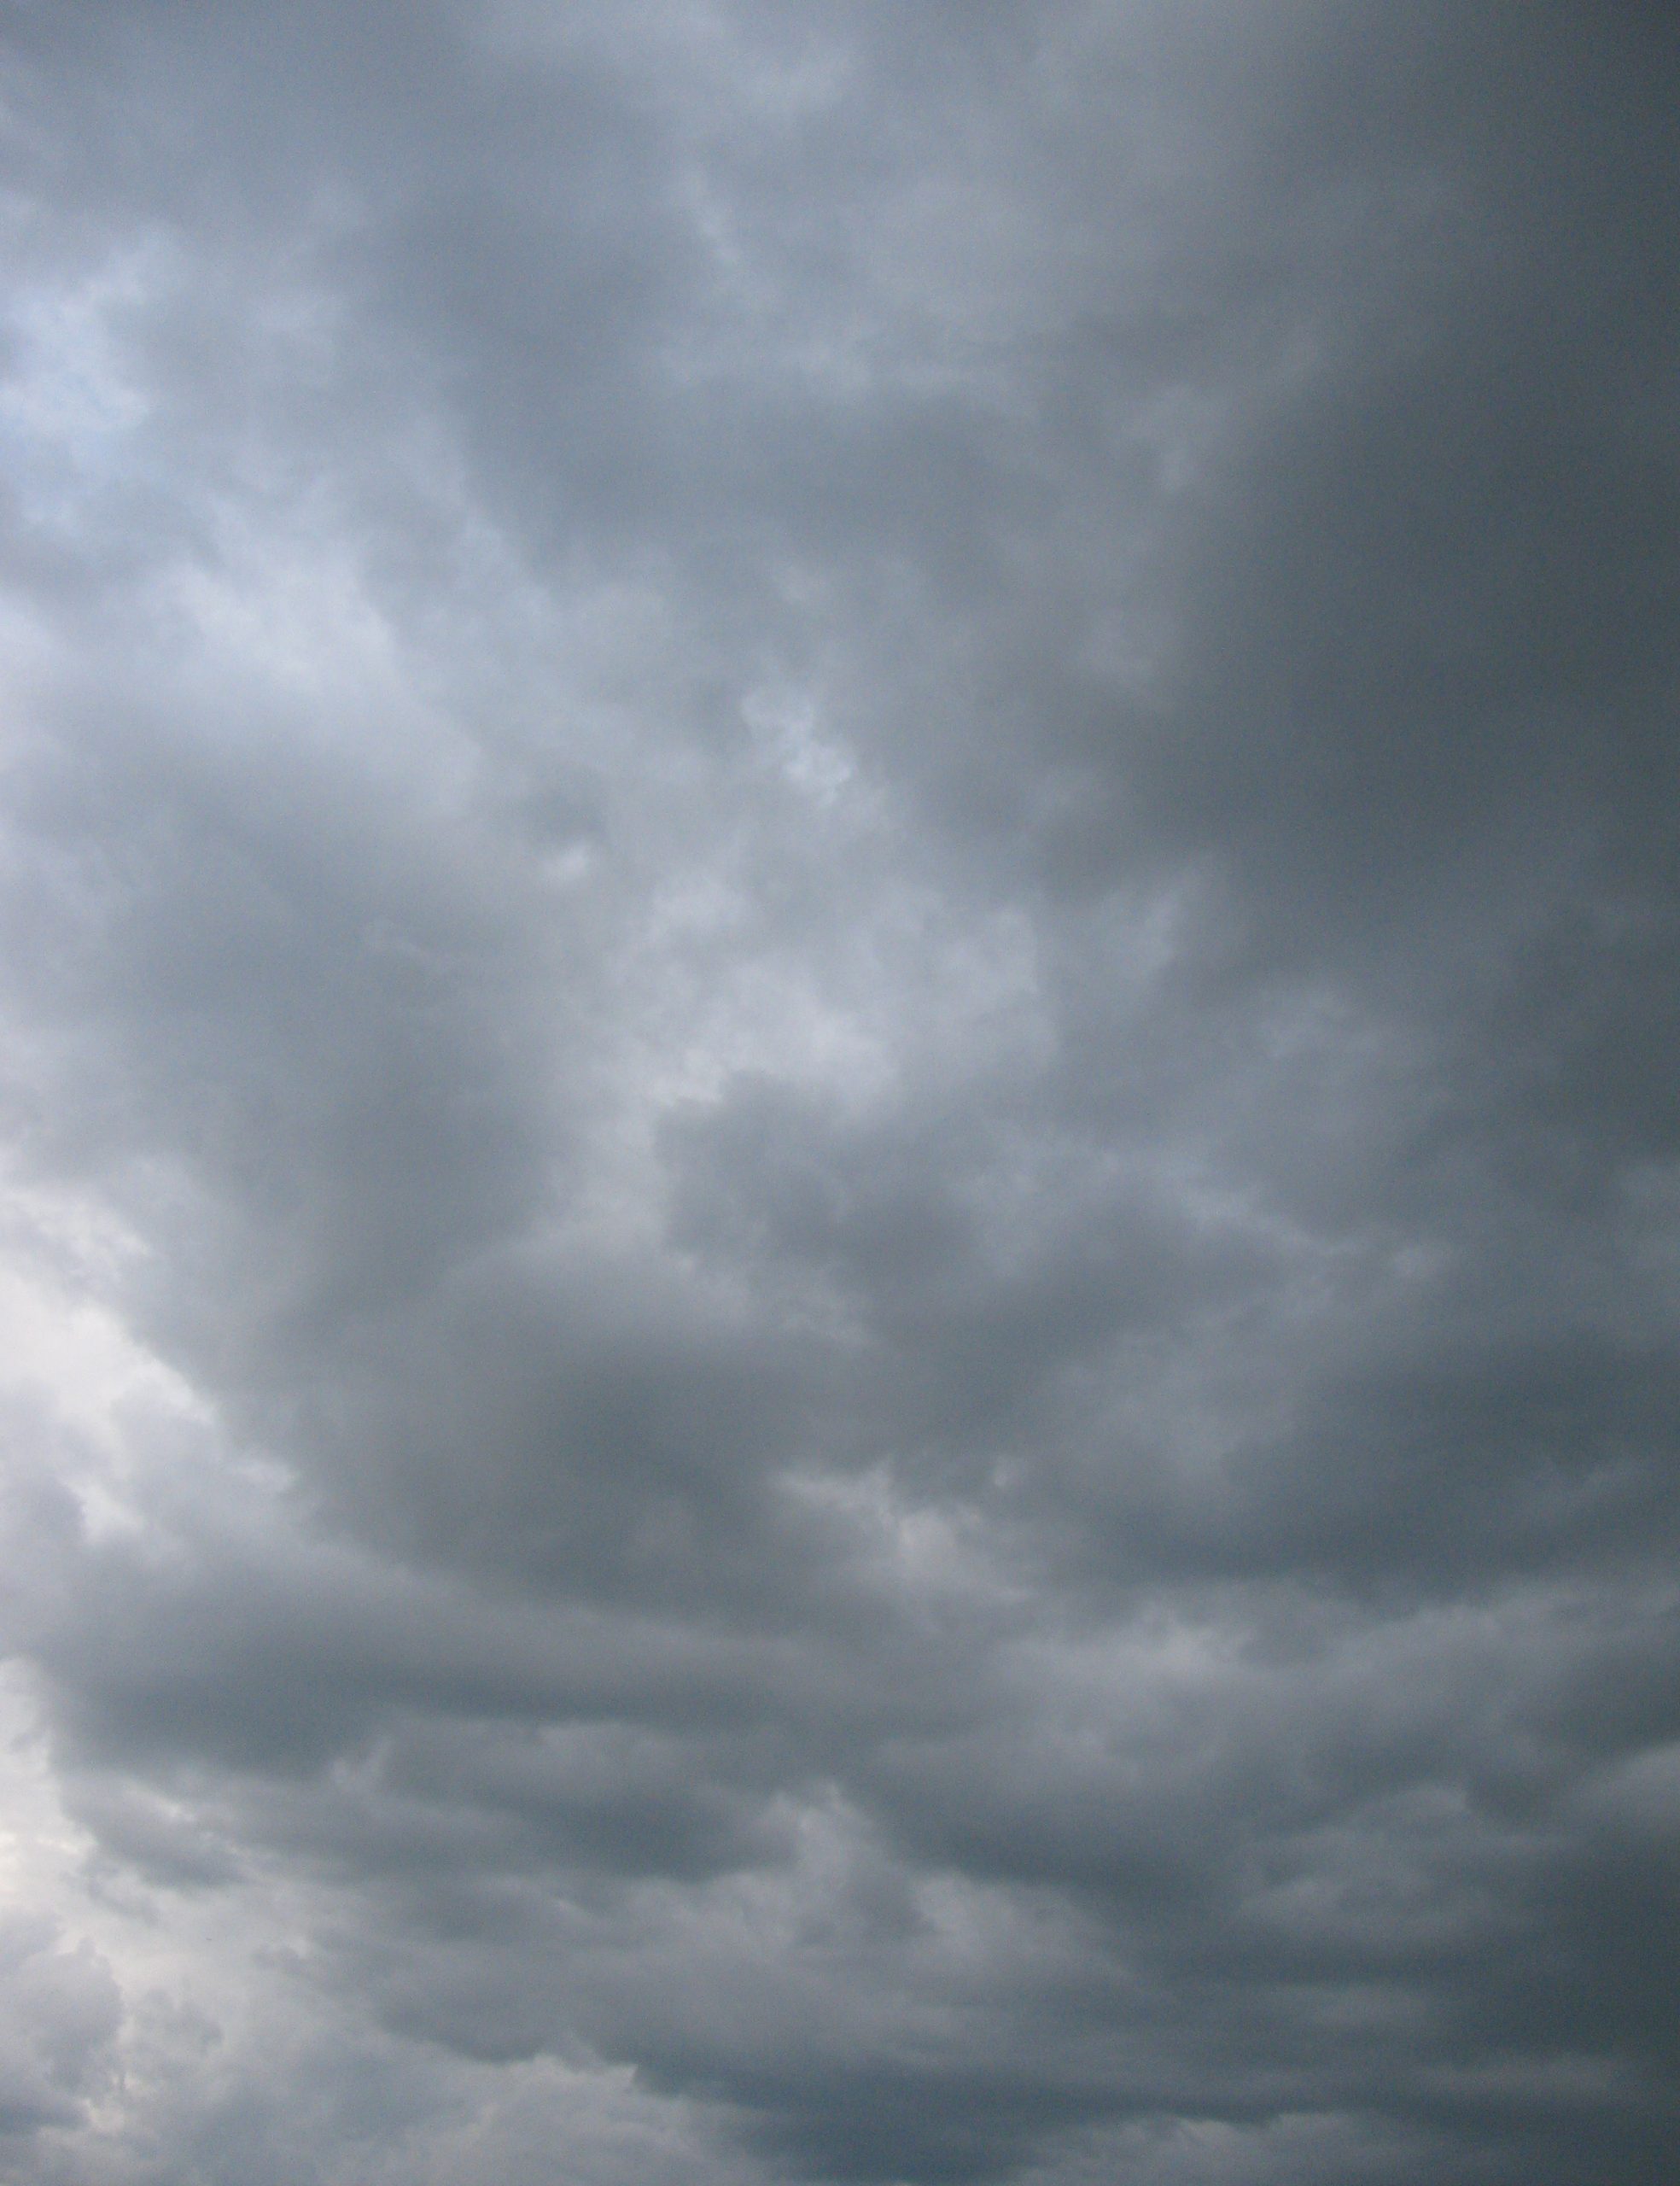
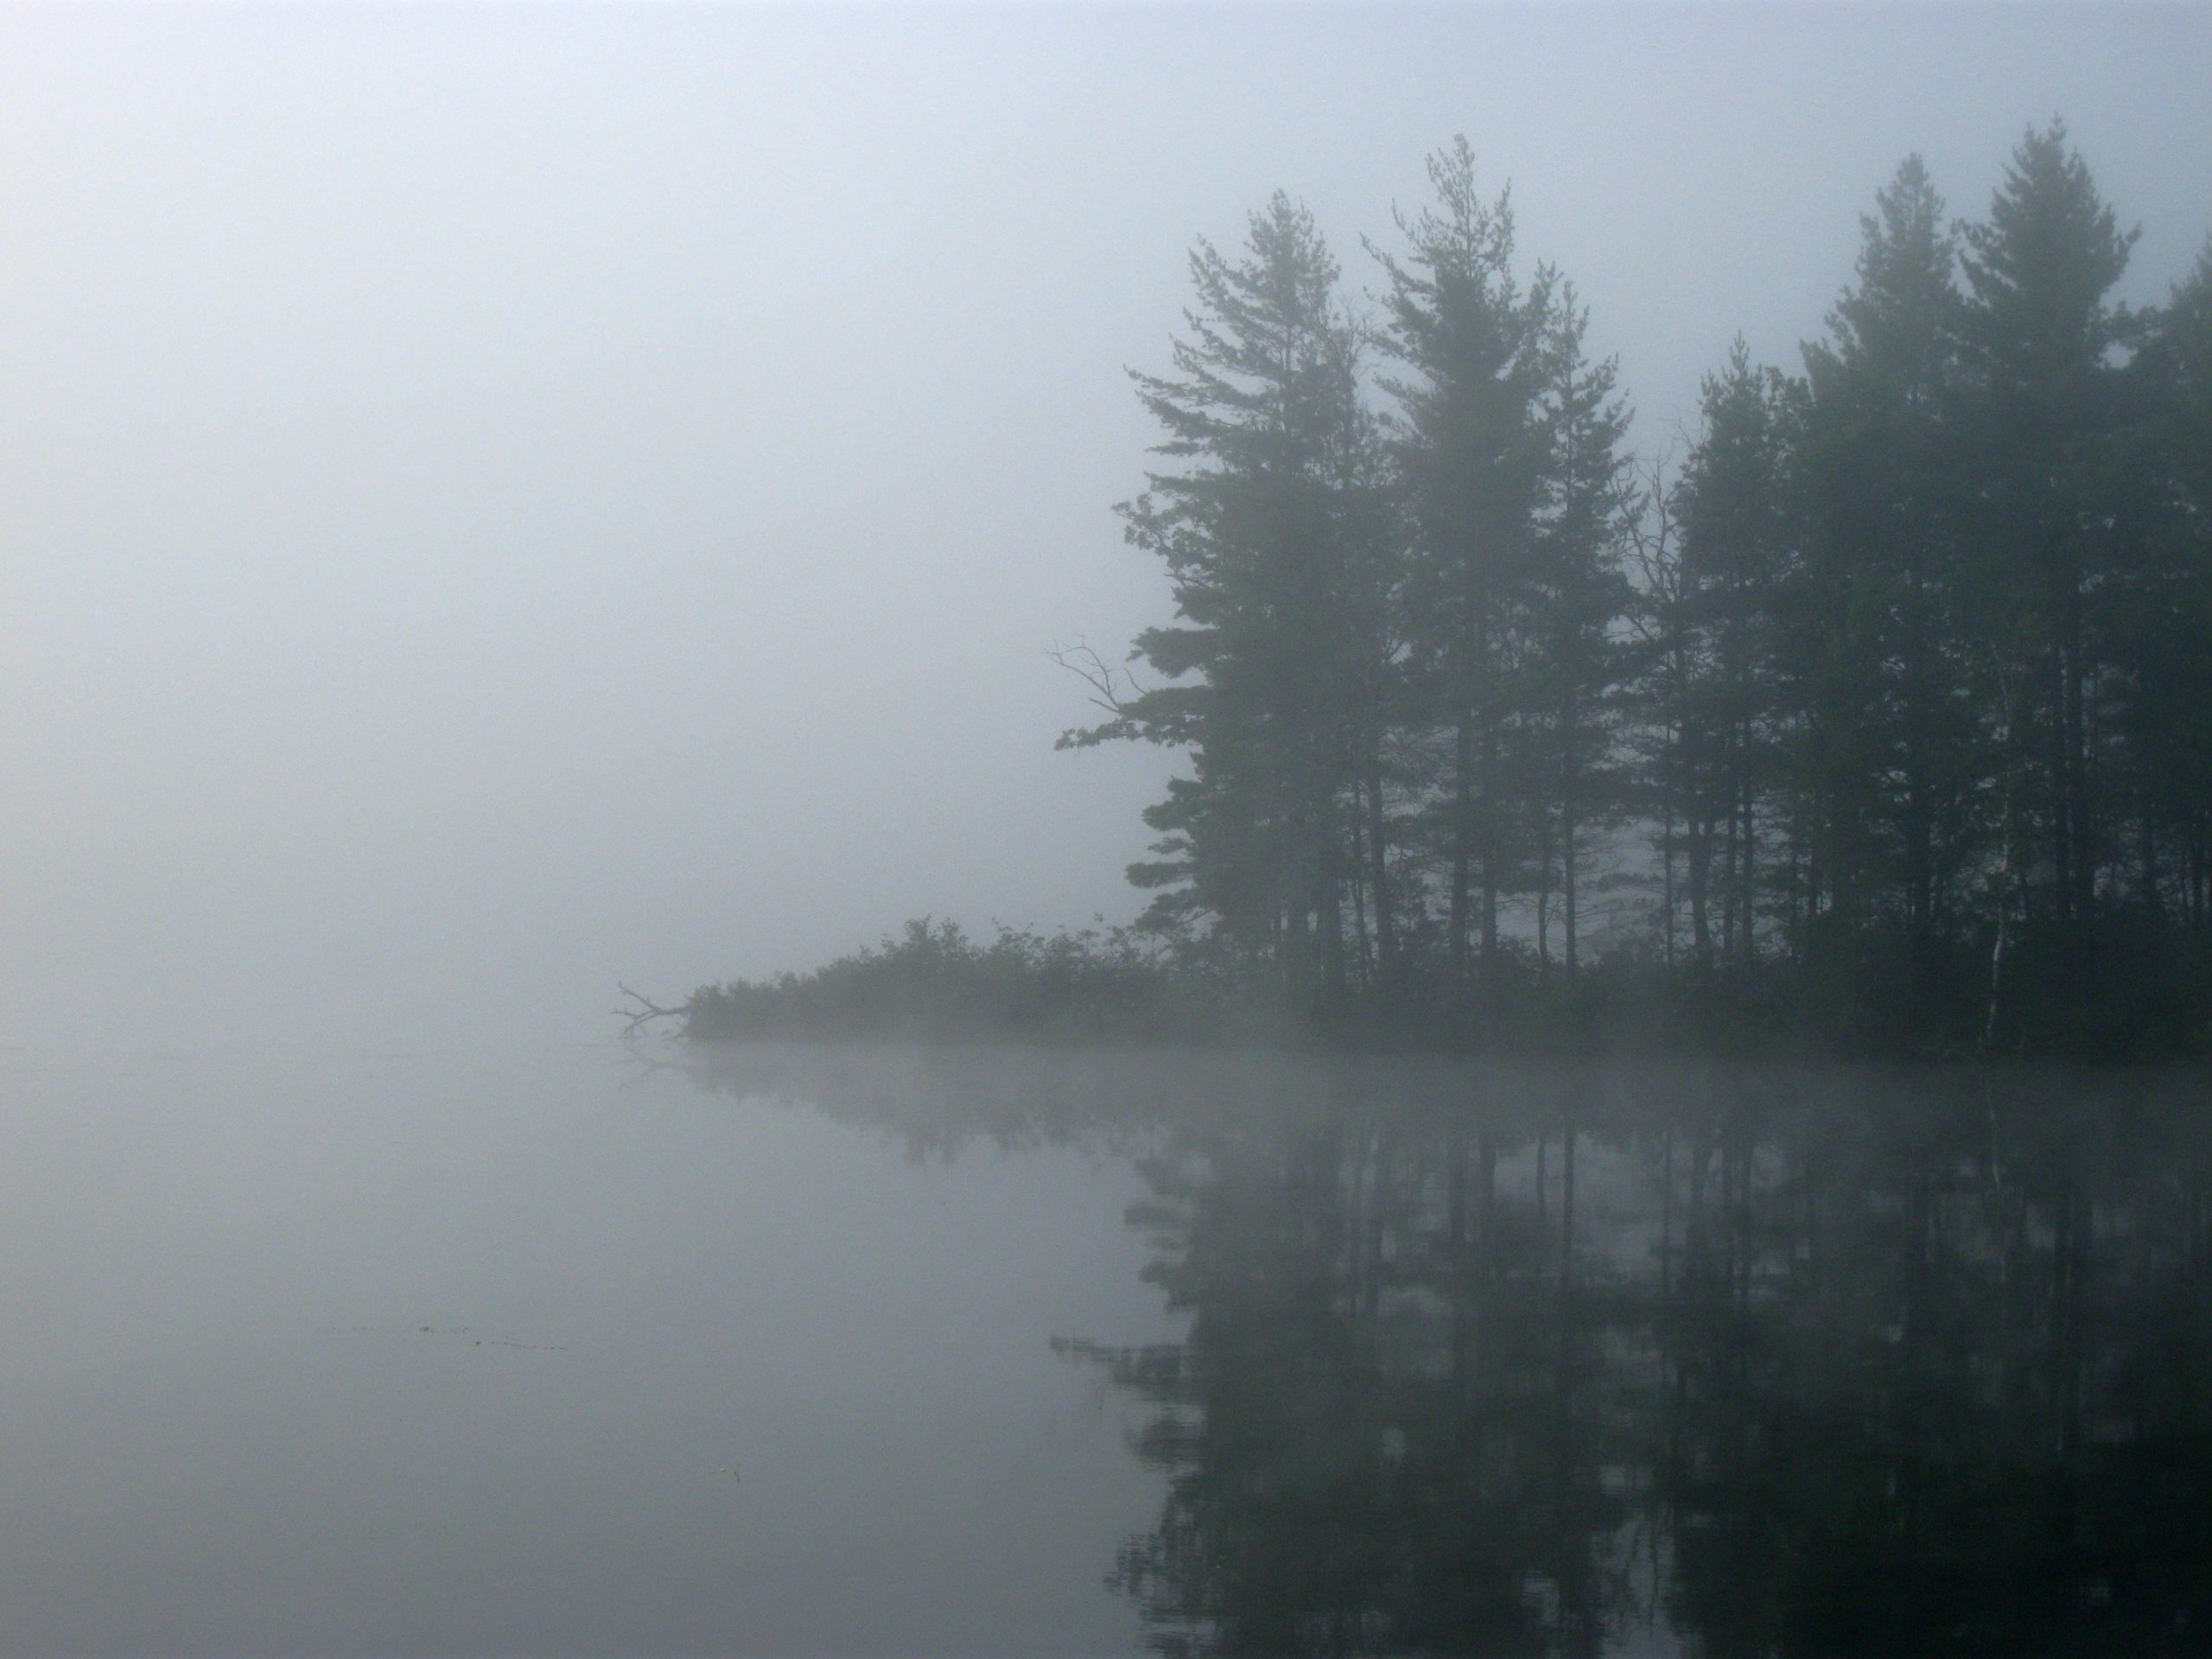
We start with 7 photos: lake.jpg sky.jpg
Start
Open a new document.
Open the photo ‘lake.jpg’ and import it into the main document.
Re-size and position so that the horizon is higher than the middle of the document.
Open the photo ‘sky.jpg’ and import it into the main document.
Re-size and position/re-shape so that the sky covers the top half of the document.
Edit>Transform>Flip Horizontal (this will put the lighter part on the right side).
Click the ‘Add layer mask’ icon at the bottom of the Layers Window.
With a soft black brush blend the two images together.
Open the photo ‘lake.jpg’ and import it into the main document.
Edit>Transform>Flip Horizontal.
Re-size and position so that the island is on the left side and along the horizon.
Click the ‘Add layer mask’ icon at the bottom of the Layers Window.
With a soft black brush remove the parts not required (we clicked around the grey area on the right side to remove it and changed the size of the brush to ‘feather’ right up to the trees).
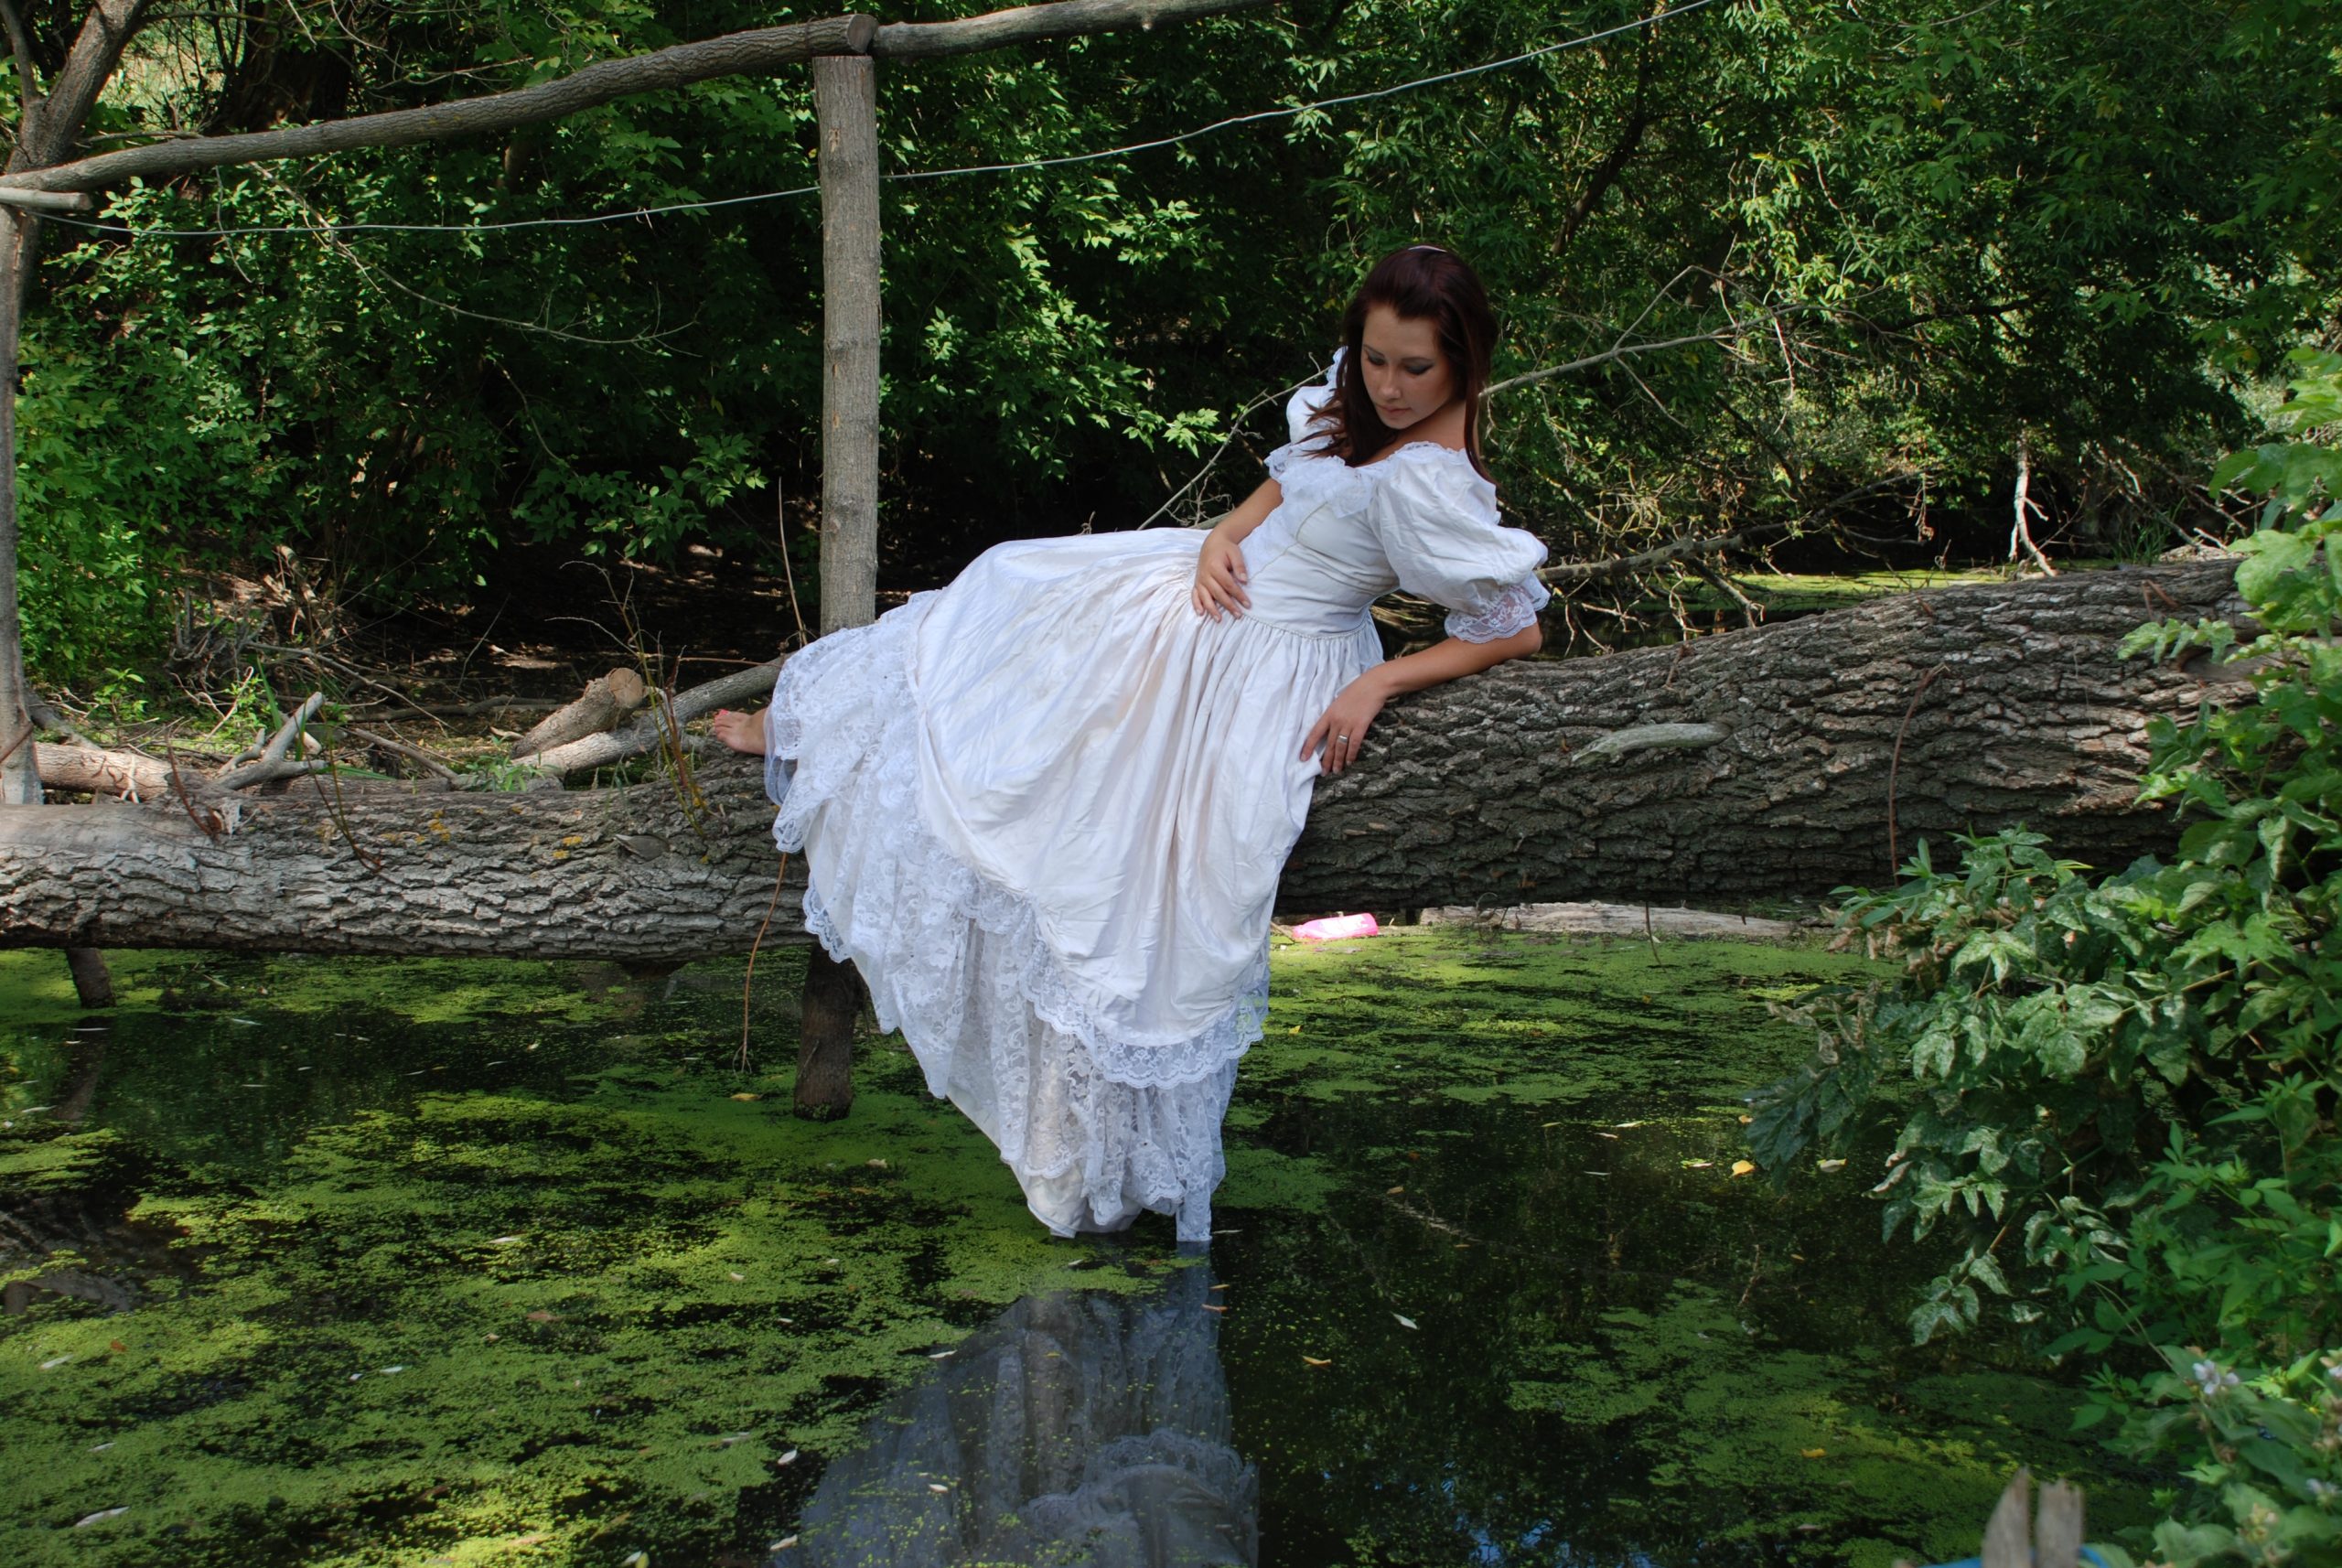
Model
Open the photo ‘model.jpg’.
Select>Subject.
Tweak the selection using the ‘quick selection tool’ on the left side toolbar (by keeping ‘Shift’ pressed you can add to the selection or by keeping ‘Alt’ pressed, delete from the selection).
Add the ‘log’ to the selection by using the ‘polygonal selection tool’ on the left side toolbar and keeping ‘shift’ pressed to add to the selection.
Click ‘Select and Mask’ from the second top menu bar.
Select ‘Refine Brush’ from the left side toolbar (second from the top) and run it around her hair.
‘Feather’ by .5 pixel.
‘Shift Edge’ -10%.
Tick ‘Decontaminate Colours’ than ‘OK’.
Select the ‘Layer Mask’, right click and select ‘Apply Layer Mask’.
Import this layer into the main document.
Re-size and position the model so she is in the ‘right third’.
Enhancing
Use the ‘spot healing brush’ on the left side toolbar to remove the small reeds growing on the log and the ‘Cloning tool’ to remove any unsightly parts (‘Alt’ click to set the point you want to clone from then click over the parts you want to remove).
Select the ‘model’ layer and:
Filter>Nik collection>Colour effects pro
Select ‘Detail Extractor’, adjust the ‘detail extractor’ slider to 20% and click ‘OK’.
Select the top ‘model’ layer.
Click the ‘Add layer mask’ icon at the bottom of the Layers Window.
With a soft black brush paint away the ‘detail’ on the log.
Select the bottom ‘model’ layer.
Select the ‘rectangular selection tool’ from the left toolbar.
Draw a selection around the bottom of the dress.
Place this on it’s own layer by pressing ‘Ctrl+j’.
Edit>Transform>Flip Vertical
Re-position to be the reflection of the dress.
Adjust ‘opacity’ to suit (about 30%).
Select the bottom ‘model’ layer again.
Click the ‘Add new layer’ icon at the bottom of the Layers Window.
Attach this layer by ‘Alt’ clicking between them.
With a soft black brush paint in the darker area on the bottom half of the log.
Adjust ‘opacity’ to suit.
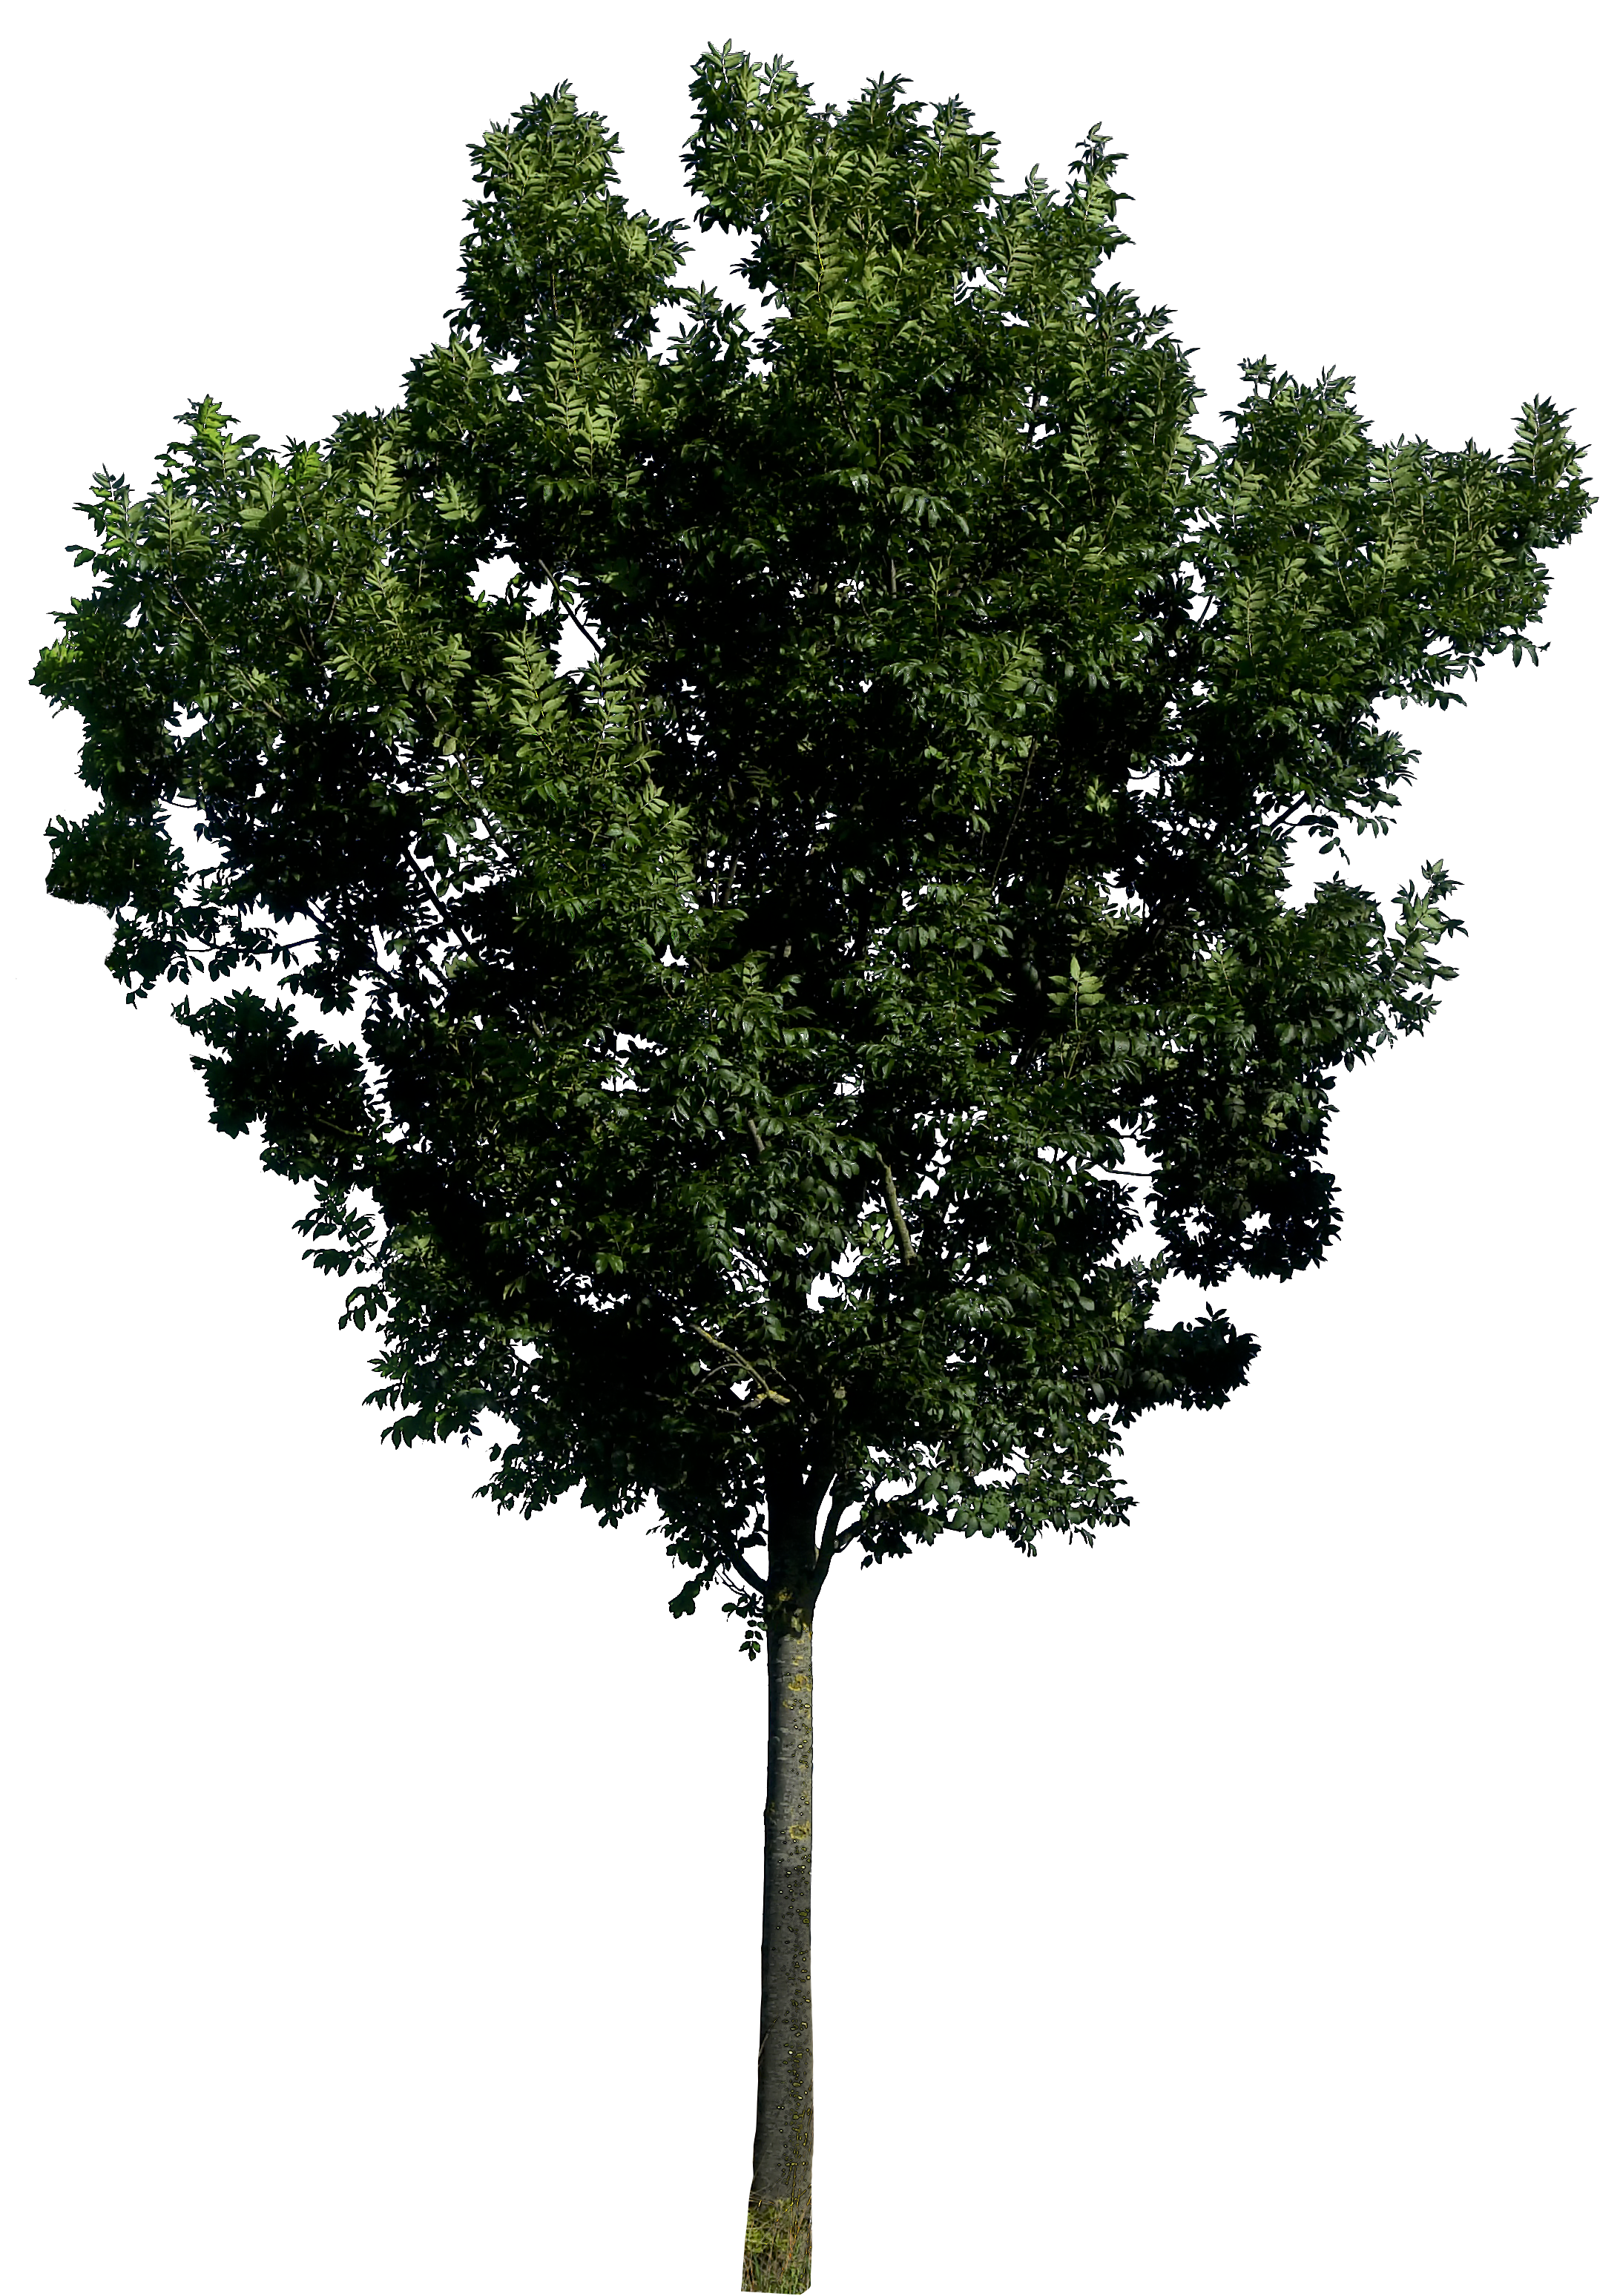
Greenery
Open the photo ‘bush.jpg’ and import it into the main document.
Re-size and position so that it is just showing on the right side in the bottom half.
Copy this layer by pressing ‘Ctrl+j’.
Re-size and position so that it is just showing on the right side in the top half.
Copy this layer by pressing ‘Ctrl+j’.
Edit>Transform>Flip Horizontal.
Re-size and position so that it is just showing on the right side in the middle.
Select the top ‘bush’ layer and:
Layers>Merge down, then repeat to get all three bushes on the same layer.
Click the Add new fill or adjustment layer’ icon at the bottom of the Layers Window and select ‘Hue/Saturation’ attach this to the layer by ‘Alt’ clicking between the two layers.
Hue : -25
Saturation : -25
Lightness : +15
Open the photo ‘bush.jpg’ and import it into the main document.
Re-size and position on the left side so that it is just showing above the log.
Copy this layer by pressing ‘Ctrl+j’.
Re-size and position on the right so that it is hanging from the log.
Select the top ‘bush’ layer and :
Layers>Merge down.
Click the ‘Add layer mask’ icon at the bottom of the Layers Window.
With a soft black brush paint away the parts of the bushes not required.
Click the Add new fill or adjustment layer’ icon at the bottom of the Layers Window and select ‘Hue/Saturation’ attach this to the layer by ‘Alt’ clicking between the two layers.
Hue : -25
Saturation : -25
Lightness : +15
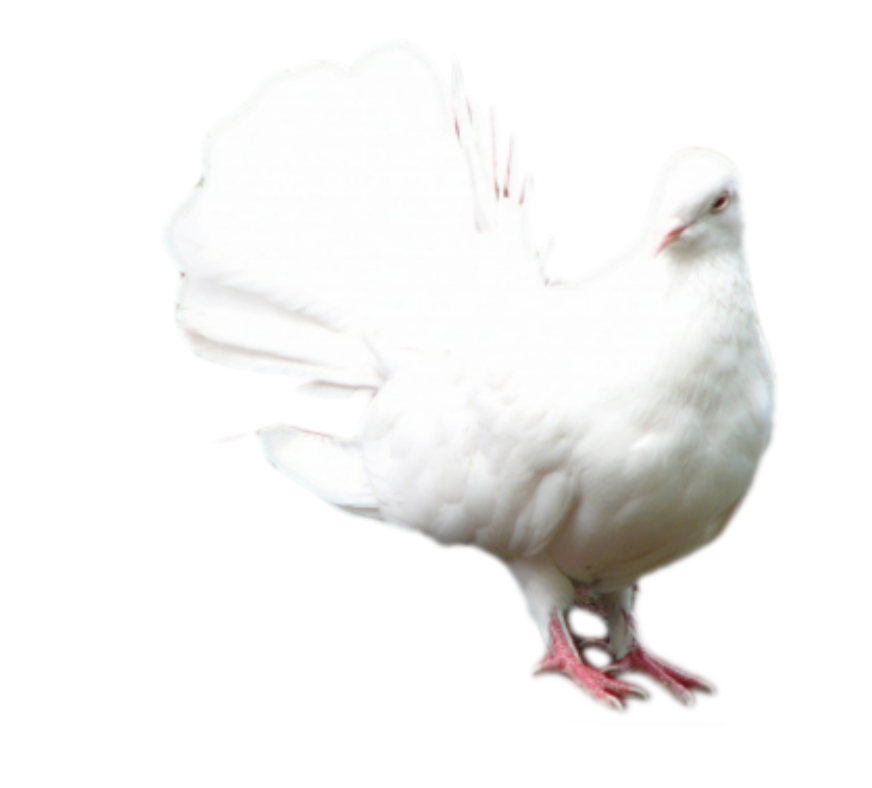
Birds
Open the photo ‘bird standing.jpg’ and import it into the main document.
Re-size and position on the left side of the log.
Open the photo ‘bird flying.jpg’ and import it into the main document.
Re-size and position in front of the background trees.
Select the top ‘bush’ layer and:
Layers>Merge down.
Click the Add new fill or adjustment layer’ icon at the bottom of the Layers Window and select ‘Hue/Saturation’ attach this to the layer by ‘Alt’ clicking between the two layers.
Adjust ‘Lightness’ to about -15
Finishing
Select the top layer in the ‘layers stack’.
Click the ‘Create new fill or adjustment layer’ icon at the bottom of the Layers Window and select ‘Colour Balance’ adjust the top slider to +25 and the bottom slider to – 25.
Click the ‘Create new fill or adjustment layer’ icon at the bottom of the Layers Window and select ‘Gradient Map’ – select a black to white gradient – change the ‘blending mode’ to ‘soft light’ – reduce ‘opacity’ to suit (round about 20% – this increases the contrast).
Click the ‘create new layer’ icon at the bottom of the ‘layers window’ and move it to the top of the ‘layers stack’.
With a large soft black brush at 20% opacity – paint in a vignette, repeat until you get the desired effect.